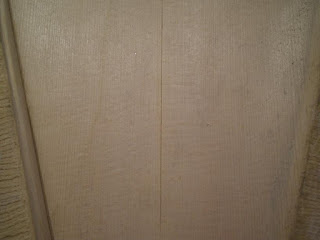
This morning I got up, took a look at my soundboard, and sadly I now find that a crack has developed in the glue joint between the two halves of the soundboard. Here are some pictures.

 I guess this cements the decision I already made to remake my soundboard. I imagine I will attempt to fix this, but I am going to see what the experts say at the Cafe first.
My wife and I had another yard sale today so I wasn’t able to work on the mando through the day, but once we were done with that I was able to spend a few quality moments with my now-possibly-defunct soundboard. One of the luthiers at the Cafe suggested that, assuming I am able to salvage the soundboard, I should remove the sides completely and re-glue. So, as a first attempt, I gave a relatively gentle tug between the two and - pop -they came further apart. Another gentle tug and - pop-pop - almost completely apart with only the head-block remaining attached to the soundboard. Add a bit of water, pull again, and - pop - completely free. Now, either my initial glue job was a lot worse than I thought, or my water soaking method had a much greater effect than I previously thought. As I think about it, I am guessing probably both.
In any case, there are three distinct lessons I have learned from this; one - take extra care to make sure that you are gluing pieces where they actually belong (the first time), two - if you can’t make yourself follow lesson one, DO NOT SOAK THE SOUNDBOARD in an attempt to salvage pieces that simply be replaced (and they can all be pretty well replaced), and three - take extra care to make your joints correct BEFORE gluing - otherwise you get to do it over.
Finally, after removing the sides, I thought I would hold the soundboard up to a bare light bulb to see just how good of a job I did carving the thing. Below is a picture of what I saw.
 As you can see, I did not do a very good job (yet another reason I am becoming happier and happier to remake the thing). From what I have read, there ought be a nice, distinct light ring about an inch or so in from the edge where the wood is thinner than everywhere else. This ring should be of roughly uniform width and go pretty much all the way around. The rest of the surface ought to be pretty uniform getting thicker in the center. On mine, it is clearly quite a bit thicker at the base and inconsistent everywhere else. Obviously checking this against a light is not a step I took before. I certainly will on the next one, though.

2 comments:
Hi--interesting blog. I talked to a luthier I know in Goshen, IN and he mention that Gibson mandolin tops he has examined were very inconsistent in their carving thicknesses. Just an anecdote I thought you might be interested in.
Hi Charles. I had not heard anything like that before. Thanks. I have to assume that, unlike me, those guys at Gibson had a thorough understanding of their craft and knew what it REALLY takes to get the sound they were after. I can only hope I will one day get to that level myself. Thanks for the comment. Steve
Post a Comment