Showing posts with label build. Show all posts

Saturday, April 18, 2009

Definitely Replacing the Soundboard

Saturday, April 18, 2009.

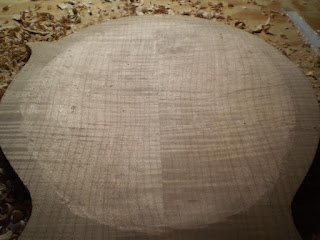
This morning I got up, took a look at my soundboard, and sadly I now find that a crack has developed in the glue joint between the two halves of the soundboard. Here are some pictures.


I guess this cements the decision I already made to remake my soundboard. I imagine I will attempt to fix this, but I am going to see what the experts say at the Cafe first.

My wife and I had another yard sale today so I wasn’t able to work on the mando through the day, but once we were done with that I was able to spend a few quality moments with my now-possibly-defunct soundboard. One of the luthiers at the Cafe suggested that, assuming I am able to salvage the soundboard, I should remove the sides completely and re-glue. So, as a first attempt, I gave a relatively gentle tug between the two and - pop -they came further apart. Another gentle tug and - pop-pop - almost completely apart with only the head-block remaining attached to the soundboard. Add a bit of water, pull again, and - pop - completely free. Now, either my initial glue job was a lot worse than I thought, or my water soaking method had a much greater effect than I previously thought. As I think about it, I am guessing probably both.

In any case, there are three distinct lessons I have learned from this; one - take extra care to make sure that you are gluing pieces where they actually belong (the first time), two - if you can’t make yourself follow lesson one, DO NOT SOAK THE SOUNDBOARD in an attempt to salvage pieces that simply be replaced (and they can all be pretty well replaced), and three - take extra care to make your joints correct BEFORE gluing - otherwise you get to do it over.

Finally, after removing the sides, I thought I would hold the soundboard up to a bare light bulb to see just how good of a job I did carving the thing. Below is a picture of what I saw.

As you can see, I did not do a very good job (yet another reason I am becoming happier and happier to remake the thing). From what I have read, there ought be a nice, distinct light ring about an inch or so in from the edge where the wood is thinner than everywhere else. This ring should be of roughly uniform width and go pretty much all the way around. The rest of the surface ought to be pretty uniform getting thicker in the center. On mine, it is clearly quite a bit thicker at the base and inconsistent everywhere else. Obviously checking this against a light is not a step I took before. I certainly will on the next one, though.

Friday, April 17, 2009

Some Backwards Steps

Friday, April 17, 2009.

Earlier this week, I posted some pictures of my work out on the Mandolin Café website and luckily (or unluckily I suppose depending on how you look at it) one of the REAL luthiers who frequents the site pointed out that one of my tone bars was glued in the wrong location. Sure enough, when I went back and checked it against the plans, I had indeed missed the mark. A little embarrassing to not catch something so big myself, but I guess that’s what learning is all about.

So yesterday, I decided to try to “unglue” the bar by soaking it with water hoping to soften the glue enough to get it off. After letting it soak overnight, not only was I NOT able to get the bar off, but I DID manage to unglue the soundboard from the side wood. Oh yeah, I also managed to warp the soundboard. And I suspect I might have ruined the glue joint between the kerf lining and the side wood, too. Way to go, Steve!

Of coarse one of the other REAL luthiers suggested that I simply carve away the mis-located bar and replace it with a new one. I thought about doing it this way (and probably should have taken his advice) but not having extra wood from which to make a new bar, I opted to try my removal process instead. Sigh.


So, all this damage done, I have decided to start over on the soundboard-side wood bending-kerf lining. I can’t say that this is a really bad thing, though, since I must confess that I was a little disappointed in the overall results I had achieved on this first assembly – my side wood bending was a little “off” from the shape of the mold, my mahogany blocks were not quite the right shape to match the thickness of the side wood, and I think I can do a much better job of shaping and finishing the soundboard before installing the tone bars. In all, I think I will probably be a lot happier with my finished instrument this way. So, I placed another order today with my friends at Steward-MacDonald for new top and side wood and, once that arrives, I can begin again.

This evening, I got home from work and took another last look at the tone bar, having decided to go ahead and continue to let it soak all day - after all what more damage could I do? When I took the soak rag off, much to my surprise, the tone bar popped right off. No additional damage to the soundboard.

I’m still gonna go ahead and build the second soundboard though. After considering my ongoing disappointment with the first one, I think I will be a lot happier if I do.


In the mean time, I still have plenty to do with finishing the back and getting the neck ready to attach. Here is how the scroll on the back is coming.


In the long run, my hope is to “salvage” the old soundboard-side assembly enough to use for a “mandolin-build-in-process” display some day. I have often thought that this kind of display would be kind of cool to have set up at a festival or such. Maybe this can be my first piece for such a display.

Sunday, April 12, 2009

Carving the Back

Sunday, April 12, 2009.

What little time I had this week was completely focused on carving the outside of the back. As with the soundboard, I did all of this by hand using my carving tools and scraper. Unlike the soundboard though, for the back I went ahead and clamped the part to the bench while I carved. Clamping certainly makes it a lot easier to remove material than working free-hand does especially when carving on hard wood.

Like the soundboard, I used templates from the book as a guide. This shows my templates laid out in the positions where they were used.


As you can see in the three shots above, I decided to start by clamping one edge to the bench and then remove much of the excess wood from the unclamped side. I figured this would save me time later in the process. As it turns out this really did not help me much and, on my next project, I will not do it again. Rather, I will carve out the shape of each of the patterns, as I did with the soundboard, and then carve the rest to match. This is the technique I ended up using for the most part anyway. Here are more photos after I got most of the body work done.


And then I worked on the top and some on the scroll. Photos below.


As should be clear from this last picture, I have only started roughing the scroll. I imagine I will probably make it somewhat shorter (lower profile) than it is now and, depending on how I end up liking the scroll extension to the back, I may do away with it, too.

Sunday, April 5, 2009

Cutting F-Holes, Tone Bars, and Gluing on Soundboard

Sunday, April 5, 2009.

While it was a short week and I wasn’t able to spend as much time on my project as I would have liked, I still accomplished some of the more impressive steps to date and am very pleased with where I am.

Having been out of town on Saturday, Sunday and Monday of last week, I got back to work on Tuesday evening by first removing all my clamps from where I left them last Friday and then cutting out the F-holes in the soundboard.


The photos above show the results of my gluing on Friday.

As I started to cut the F-holes I was a little nervous about this step since the soundboard is so thin (as little as .01”) and I was planning to use a powered scroll saw to do the work. My fear, naturally, was that the scroll saw would cause cracks or some kind of chipping. My other option was to try to cut these manually using a hand-held scroll saw with one hand while trying to steady the soundboard with the other. While the manual method would likely help prevent chipping and cracking, I opted for better material handling control and went with the powered method. I figured the gauze I glued in earlier was my insurance against damage. As Mr. Siminoff suggested, I made sure to cut slowly.

I started by drilling four holes, one in the center of each scroll “balls” (best description I can think of on short notice) using a small 1/6” bit as a pilot followed with a larger 1/4” bit which is big enough to allow the scroll saw blade to be inserted. Then with these four holes drilled, I moved over to the scroll saw and began cutting.

In this picture, you can see where I have made my first cut from one hole to the other and am getting ready to cut around the ball.

As I did this next step, I learned something - cut out the ball first and then cut the long stretches. Here is why; as I made the cut around the ball, the “stretch” cut (my term) completed earlier, I found that the wood was vibrating badly and realized that the inside point where the stretch cut meets the ball was having to handle all that vibration with no support. Had I cut the ball first and then the stretch, starting the stretch cut at the point, the stress from the vibration would have been shared by a lot more wood rather than just the point. I hope that makes sense.

In any case, the points on this first F-hole made it through my abuse and I went successfully on with the second one much happier with my new-found insight. Here are some photos of the finished results after some sanding.


That pretty much did it for Tuesday night.

Wednesday I started with the tone bars. Back when I started this project, I made it a point to save pretty much all my scrap wood so, when it came time to make these, I was able to cut them out of the scrap pieces I saved from the blanks used to make the soundboard itself. Once I had cut out my tone bar blanks as per the dimensions in the book, I needed a way to transfer the shape of the inside curve of the soundboard to the bars so I could cut them to fit. To do this I went about as simple as it gets. I took a small piece of scrap side wood and taped on some lead from my mechanical pencil. Holding this in my right hand while holding the tone bar blanks in position with my left, I gently traced the curvature onto the blanks.

The razor blade (that’s saw dust on it) is there for reference.

Once I had the blanks marked I cut them roughly to shape.

Then I went through the time-consuming process of sanding and shaving them to actually match.

Then it was time to glue them in place. For this, I used three clamps one each tone bar with leather cauls on the back side of each clamp and a board on the from to help distribute the pleasure more evenly. As with most gluing procedures, I finished of the night with this step and left them to dry for 24 hours.


These photos only show the first of the two bars being glued. I glued the second one on right after taking the pictures.

Thursday I removed the clamps and did an initial crowing and cleaned the edges of the joints between the bars and the soundboard.


That is a pencil mark on the front edge I used as a reference while fitting the tone bar, not a crack. It actually fooled me once while I was working on it, too.


Come Friday, it was time to glue the soundboard to the sides. This process was one I had been looking forward to with both excitement and a little bit of trepidation. I figure this is where it starts coming together or you find out you have to take some big backward steps. While I frequently compared my soundboard to the side assembly at each stage of the process, I couldn’t help but worry. Fortunately, nothing seemed too out of whack to prevent me from gluing up, so I went for it.

For this, I used my 40 cello clamps, the side mold for reference, and hide glue. After preparing the clamps and getting the hide glue to temperature, I spread the glue and worked as fast as I could to clamp the soundboard in place. Here’s how it looked with all the clamps in place.


I was concerned with the time that it took to get all the clamps on since I have read that the hide glue dries quickly, but I figured that even though it took longer to complete than I wanted, I would wait and see how it looked once dried and, if necessary, take it apart and try again if it didn’t hold. With that, I was done for Friday.

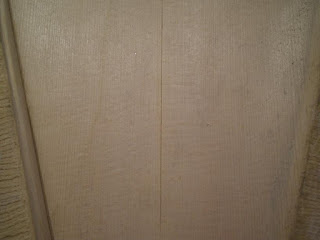
Saturday was completely a wash as far as mandolin building goes since my wife and I decided to go to an auction that ended up lasting all day. We got some good stuff, but boy, what a day. Once we got home and got unloaded, it was about 9:00 pm, so about all I had time for was to unclamp and inspect my glue joints. It appears that contrary to my worries, my clamping speed was sufficient and the joints are tight. Here is how it came out.


I’m going to have even less time available next week so I am not sure if I will get enough done to really be worth posting, but I probably will anyway. Until then.

Friday, March 27, 2009

Soundboard, Kerf Lining, & F-Holes

Friday, March 27, 2009.

Gonna be away for a few days, so this is my post for the week. I spent the vast majority of the week on carving out the interior of the back board, again with my wood carving tools followed up by using a scraper, the same way I did earlier on the sound board.

On Monday, I also glued my sides onto the tail block. Here are some photos.


I’m not particularly thrilled with the seam I ended up with once the glue set because of a small gap at the top of the joint between the two side pieces, but since some of it will go away due when I install the side bindings and the tail piece should cover most, if not all, of the rest of it, I’m not going to stress over it. In any case, I my plan is to try to fill the gap with a glue/sawdust combo before I attach the soundboard. Here is what the gap looks like (the quarter is for reference).

With the tail block glue setting, I got started with carving the back board.

As with the soundboard, I used Mr. Siminoff’s templates to gauge my depths as I cut.

For this first picture, I have placed each of the templates in their specific location on the back. Using my gouge, I then grooved out the wood to the approximate depth of each template and then cut out the material in between.

Progress at the end of Monday. It’s kind of hard to tell from this photo, but at this point I had cut two grooves and roughed the shape from the tail to the first groove.

Progress at the end of Tuesday.


And by the end of Wednesday, I had pretty much completed the major roughing.

Thursday evening was spent with the scraper getting the many of the humps and swales out with more yet to do. I didn’t post any more photos of it because I can’t see enough difference between those and the close-up shot above to see the value.

This morning (I have the day off today) I chose to take a break from scraping and go ahead and glue in the kerf lining for the soundboard. Using my hide glue once again, and the 40 clothes pins I purchased previously at the hobby store, here is how that looks.


From what I can see from the fact that the glue oozed out as I applied them, I am quite pleased with the strength of the clothes pins with out any additional rubber bands (a technique I read about that others have used to get a tighter grip). We’ll see once the glue sets if I am still pleased then.

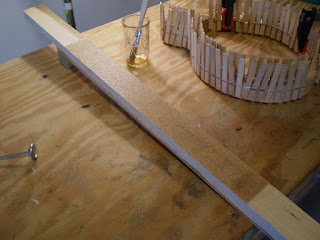
Pretty soon, I will be to the point where I will be gluing the soundboard to the sides, but before I can do that, I will need to get the top edge of the sides leveled all the way around. To do this, I have made myself a sanding board from a scrap board (saved from when I made my truing board) with sandpaper glued to one side.

Now that I am ready to sand, all I have to do before I can start is to wait for the glue on the kerf to dry. According to Mr. Siminoff, I should wait at least 24 hours for that which means sanding will have to wait until I get back. So in the mean time, I got a couple of other items done today.

When we last saw the neck, I had glued the two pieces onto the sides of the peg head and then sanded it down. There is, however, a whole lot of work left to do on it before it is ready to be fitted to the body and I thought I would get started with some of it.

The next bit that needed to be done was to install a scroll reinforcement. This takes the form of a 1” diameter maple disk that is installed on the larger of the two peg head scrolls to help prevent it from cracking or breaking off. This is done by drilling out a 3/16” deep pocket with a forstner bit (a drill bit that cuts a flat-bottomed hole) and then gluing in a maple disk whose grain is oriented perpendicular to that of the peg head. This gives opposing wood grains in the area where the peg head scroll is the weakest and, because it is ultimately covered by the peg head veneer, it is hidden.

Like the kerf lining, this also needs to be clamped and allowed to dry for at least 24 hours. I left the disk a little long so that I could sand it down to the exact height of the peg head once the glue is dry.

The other thing I got accomplished was to mark the locations of my F-holes on the front of the soundboard,

and to then glue gauze onto the inside for support.

Since the F-holes are located in the thinnest part of the soundboard, the gauze helps prevent splitting especially while cutting the holes on the scroll saw. Like everything else I have done today, this needs to dry for at least 24 hours before I can cut.

Until next week. Tune in again - same Bat Time, same Bat Channel.