Yesterday I got a few honey-do list projects done and then got to spend a little time prepping and gluing the new soundboard together. I chose not to include pictures of that since they would be of little difference than the ones I posted for the first. That was about all I got done on Saturday.
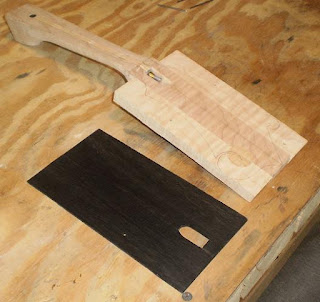
Today, while the soundboard glue continues to cure, I took to the task of gluing my peghead veneer onto the peghead. Since, once the instrument is completed, the veneer will be butted directly against the nut and, since the nut is perpendicular to the fretboard rather than the peghead, the first step in this process is to prep one edge of the veneer to the angle of the nut.
I had done this a couple of weeks ago using a drawing from Mr. Siminoff’s book, so all I had to do today was to verify the angle still looked good to me. Holding against the peghead as if glued on, the angle of the edge appears to be perpendicular to the fretboard as it should be. Looks good.
On to the next step - sanding the peghead smooth to make it ready for gluing.
As you may recall, the last thing that I did on the neck and peghead was to install the circular scroll reinforcement. When I put the neck aside, I had not sanded down the reinforcement. So that is what I did. Since the reinforcement still protruded quite a bit, I started by using my hand-plane to remove the majority of the protrusion. Once it was close to level, I switched over to sanding with 320 grit paper on my orbital palm sander. This process only took a few minutes and now, with a silky smooth surface on which to glue, I was ready to get back to work on the veneer.
I started by match-marking the centerline on the nut and point edges of the veneer to match those on the peghead. Now that I had my reference points, I was ready to mark the outline of the peghead onto the veneer using my pattern and a mechanical pencil.

 That completed, I retraced the same pattern onto the peghead itself.
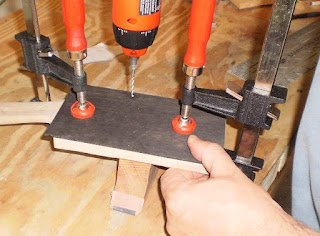
 With matching patterns on the peghead and the veneer, I was able to lay the veneer on the peghead, verify they lined up, and then clamp them in place so I could drill for alignment pins.
 The alignment pins are nothing more than finishing nails with their heads cut off that are located in the “junk” area of the peghead blank. By putting them in during the gluing process, I am assured that the veneer will align exactly where I want it, without slipping, while clamping and the glue setting. I cut off the heads of the nails so that the gluing caul (a 3/4” piece of plywood) would push them flush with the veneer without interfering with the clamping itself.
After cutting out a hole to roughly match the truss rod pocket, I was ready to glue.
 Once again using hide-glue, I liberally applied the glue and clamped up.
 After taking these shots, I also added one more clamp right over the truss rod pocket.
MISTAKE (I stopped counting) - Just after I had applied my glue and started clamping, I realized I had not cut a hole in my gluing caul over the truss rod pocket. This hole would have allowed me to clear out any glue that oozed into the truss rod pocket. Now, I will have to wait until the assembly is dry and chip/sand/scrape the glue out. Not too bad (I hope), but still a pain nonetheless.

No comments:
Post a Comment