Gonna be away for a few days, so this is my post for the week. I spent the vast majority of the week on carving out the interior of the back board, again with my wood carving tools followed up by using a scraper, the same way I did earlier on the sound board.
On Monday, I also glued my sides onto the tail block. Here are some photos.


 I’m not particularly thrilled with the seam I ended up with once the glue set because of a small gap at the top of the joint between the two side pieces, but since some of it will go away due when I install the side bindings and the tail piece should cover most, if not all, of the rest of it, I’m not going to stress over it. In any case, I my plan is to try to fill the gap with a glue/sawdust combo before I attach the soundboard. Here is what the gap looks like (the quarter is for reference).
 With the tail block glue setting, I got started with carving the back board.
As with the soundboard, I used Mr. Siminoff’s templates to gauge my depths as I cut.
 For this first picture, I have placed each of the templates in their specific location on the back. Using my gouge, I then grooved out the wood to the approximate depth of each template and then cut out the material in between.
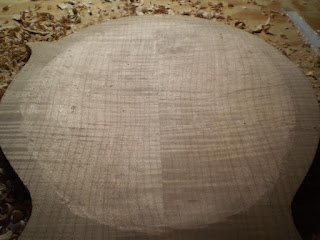
 Progress at the end of Monday. It’s kind of hard to tell from this photo, but at this point I had cut two grooves and roughed the shape from the tail to the first groove.
 Progress at the end of Tuesday.
 And by the end of Wednesday, I had pretty much completed the major roughing.
Thursday evening was spent with the scraper getting the many of the humps and swales out with more yet to do. I didn’t post any more photos of it because I can’t see enough difference between those and the close-up shot above to see the value.
This morning (I have the day off today) I chose to take a break from scraping and go ahead and glue in the kerf lining for the soundboard. Using my hide glue once again, and the 40 clothes pins I purchased previously at the hobby store, here is how that looks.


 From what I can see from the fact that the glue oozed out as I applied them, I am quite pleased with the strength of the clothes pins with out any additional rubber bands (a technique I read about that others have used to get a tighter grip). We’ll see once the glue sets if I am still pleased then.
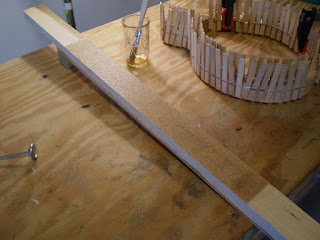
Pretty soon, I will be to the point where I will be gluing the soundboard to the sides, but before I can do that, I will need to get the top edge of the sides leveled all the way around. To do this, I have made myself a sanding board from a scrap board (saved from when I made my truing board) with sandpaper glued to one side.
 Now that I am ready to sand, all I have to do before I can start is to wait for the glue on the kerf to dry. According to Mr. Siminoff, I should wait at least 24 hours for that which means sanding will have to wait until I get back. So in the mean time, I got a couple of other items done today.
When we last saw the neck, I had glued the two pieces onto the sides of the peg head and then sanded it down. There is, however, a whole lot of work left to do on it before it is ready to be fitted to the body and I thought I would get started with some of it.
The next bit that needed to be done was to install a scroll reinforcement. This takes the form of a 1” diameter maple disk that is installed on the larger of the two peg head scrolls to help prevent it from cracking or breaking off. This is done by drilling out a 3/16” deep pocket with a forstner bit (a drill bit that cuts a flat-bottomed hole) and then gluing in a maple disk whose grain is oriented perpendicular to that of the peg head. This gives opposing wood grains in the area where the peg head scroll is the weakest and, because it is ultimately covered by the peg head veneer, it is hidden.
 Like the kerf lining, this also needs to be clamped and allowed to dry for at least 24 hours. I left the disk a little long so that I could sand it down to the exact height of the peg head once the glue is dry.
The other thing I got accomplished was to mark the locations of my F-holes on the front of the soundboard,
 and to then glue gauze onto the inside for support.
 Since the F-holes are located in the thinnest part of the soundboard, the gauze helps prevent splitting especially while cutting the holes on the scroll saw. Like everything else I have done today, this needs to dry for at least 24 hours before I can cut.
Until next week. Tune in again - same Bat Time, same Bat Channel.

1 comment:
Thought it's about time I left a comment. I'm reading your blog from beginning to end and this is where I've got to. It's extraordinarily helpful and informative, not to mention a vicarious thrill. I myself have only built cigar box instruments but I think I will soon build a flat-top mandolin from scratch. One slow step at a time for me. Thanks for your great effort in documenting your build. And the voice is very human, too, which makes it that much more pleasurable to read.
Post a Comment