Friday, March 27, 2009

Soundboard, Kerf Lining, & F-Holes

Friday, March 27, 2009.

Gonna be away for a few days, so this is my post for the week. I spent the vast majority of the week on carving out the interior of the back board, again with my wood carving tools followed up by using a scraper, the same way I did earlier on the sound board.

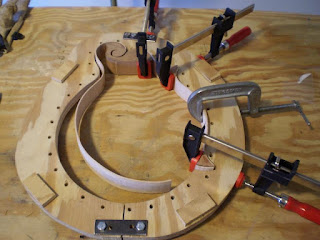
On Monday, I also glued my sides onto the tail block. Here are some photos.


I’m not particularly thrilled with the seam I ended up with once the glue set because of a small gap at the top of the joint between the two side pieces, but since some of it will go away due when I install the side bindings and the tail piece should cover most, if not all, of the rest of it, I’m not going to stress over it. In any case, I my plan is to try to fill the gap with a glue/sawdust combo before I attach the soundboard. Here is what the gap looks like (the quarter is for reference).

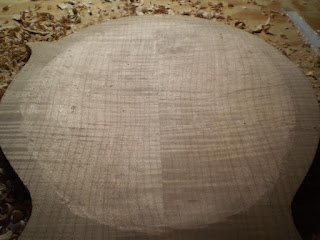
With the tail block glue setting, I got started with carving the back board.

As with the soundboard, I used Mr. Siminoff’s templates to gauge my depths as I cut.

For this first picture, I have placed each of the templates in their specific location on the back. Using my gouge, I then grooved out the wood to the approximate depth of each template and then cut out the material in between.

Progress at the end of Monday. It’s kind of hard to tell from this photo, but at this point I had cut two grooves and roughed the shape from the tail to the first groove.

Progress at the end of Tuesday.


And by the end of Wednesday, I had pretty much completed the major roughing.

Thursday evening was spent with the scraper getting the many of the humps and swales out with more yet to do. I didn’t post any more photos of it because I can’t see enough difference between those and the close-up shot above to see the value.

This morning (I have the day off today) I chose to take a break from scraping and go ahead and glue in the kerf lining for the soundboard. Using my hide glue once again, and the 40 clothes pins I purchased previously at the hobby store, here is how that looks.


From what I can see from the fact that the glue oozed out as I applied them, I am quite pleased with the strength of the clothes pins with out any additional rubber bands (a technique I read about that others have used to get a tighter grip). We’ll see once the glue sets if I am still pleased then.

Pretty soon, I will be to the point where I will be gluing the soundboard to the sides, but before I can do that, I will need to get the top edge of the sides leveled all the way around. To do this, I have made myself a sanding board from a scrap board (saved from when I made my truing board) with sandpaper glued to one side.
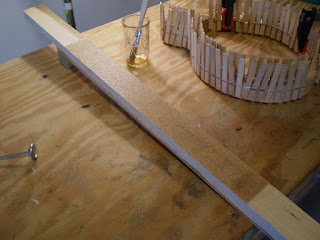
Now that I am ready to sand, all I have to do before I can start is to wait for the glue on the kerf to dry. According to Mr. Siminoff, I should wait at least 24 hours for that which means sanding will have to wait until I get back. So in the mean time, I got a couple of other items done today.

When we last saw the neck, I had glued the two pieces onto the sides of the peg head and then sanded it down. There is, however, a whole lot of work left to do on it before it is ready to be fitted to the body and I thought I would get started with some of it.

The next bit that needed to be done was to install a scroll reinforcement. This takes the form of a 1” diameter maple disk that is installed on the larger of the two peg head scrolls to help prevent it from cracking or breaking off. This is done by drilling out a 3/16” deep pocket with a forstner bit (a drill bit that cuts a flat-bottomed hole) and then gluing in a maple disk whose grain is oriented perpendicular to that of the peg head. This gives opposing wood grains in the area where the peg head scroll is the weakest and, because it is ultimately covered by the peg head veneer, it is hidden.

Like the kerf lining, this also needs to be clamped and allowed to dry for at least 24 hours. I left the disk a little long so that I could sand it down to the exact height of the peg head once the glue is dry.

The other thing I got accomplished was to mark the locations of my F-holes on the front of the soundboard,

and to then glue gauze onto the inside for support.

Since the F-holes are located in the thinnest part of the soundboard, the gauze helps prevent splitting especially while cutting the holes on the scroll saw. Like everything else I have done today, this needs to dry for at least 24 hours before I can cut.

Until next week. Tune in again - same Bat Time, same Bat Channel.

Sunday, March 22, 2009

Back and Sides

Sunday, March 22, 2009.

This week was less productive than others, but as I get further and further into this, I guess that is to be expected occasionally. What I did get done was to bend all of my side wood, glue most of it together, and to get the maple for the back ready for shaping. Now that I look at it, maybe the week was more productive than I thought.

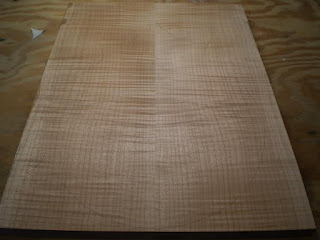
On Monday, I decided to dress the sides of my maple back wood and glue them together. I clamped each of the two halves into my truing board and squared them with my hand planer. Before I could glue, though, I had to be sure that the two edges were true and square. I did this by holding the two boards together up to the light and looking for a gap between them. The first time I did it, there was enough of a gap that I took one of the boards back to the truing board for rework. The second time, while there was still a really tiny gap, I decided to do a trial clamp-up, and the gap disappeared. Time to glue.

Here is the back glued and clamped together. Once again, I used hide glue for this and did my best to make the bottom side (opposite the clamps) as flat as possible for the sake for when I plane it later.

Tuesday, I began the process of attempting to bend my side wood. I had a lot of trouble with every bend I tried and would end up breaking the wood. After destroying one full 2-ft length, I gave up for the night and did a little research to try to find out what I was doing wrong. I went back “the source” (www.mandolincafe.com) and found an old post where several professional luthiers shared their techniques. What I found was that there were two things they do differently than I was doing. First, most of them work their unbent wood down to a thickness of 0.70” to 0.8” before bending. This, they explain, makes the bending process, especially when using the hot-pipe bending method as I am, much easier but still allows the finished sides to be strong. Second, most of them use a backing material held against the wood while bending. This backing material is typically a thin strip of metal.

So on Wednesday night, I was ready to try it again, only this time I decided to use my drum-sanding rig to thin my strips down first. This process, it turned out, took quite a while, so after I was done sanding down three strips of wood my night was pretty much used up and I was only able to bend one piece of wood, relatively successfully, before shutting down for the night.

Thursday, I was back at it again, bending and breaking my wood (dang it). The piece I was trying to bend this time was a small section that connects the head block to the first point. This piece, I had read, is thought to be one of the more difficult ones to bend and now I understand why. It is quite a short piece with opposing sharp curves at each end and, as I discovered way back as when I was attempting my first practice bends, bending the wood right at the edges is much more difficult than just about anywhere else along the strip. Consequently, I broke several of these pieces before finally getting one close. At the end of the evening, while attempting to finish bending the second to last piece I needed, I was getting pretty frustrated with my inability to get the sharper bends without cracking the edges. That was when it dawned on me that I needed to try using the backing material the professionals had recommended.

Now before you begin to question my intelligence too much, I had tried this before, but with no success. But that effort and experience was on wood that was too thick, too wide, and too early in my learning curve. Once I realized this was poor experience to base decisions on, it was time to try again.

As soon as I broke out the backing strip it was the difference between night and day. All of a sudden, no more edge cracking and quicker, sharper bends were mine for the asking. It was unreal. The piece I had been laboring over was quickly finished and, where I just knew it was going to crack, smooth. This is one lesson I will not quickly forget.

The last thing I did before closing down for the night was to glue the head block onto the scroll wood.


In these photos, it appears that I might also be gluing the upper point on, too. This is not the case. This is where I had clamped one of the side pieces onto the mold to allow it to dry to shape after bending.

Friday was movie and dinner night with my lovely wife, so no mandolin building.

Saturday I bought a surface planer. My back wood was about 1-1/8” thick at its thickest spot and about 7/8” at the thinnest. My goal, as per Mr. Siminoff’s book, is 5/8” (and flat). Not only did my wood vary in thickness, it was also quite cupped and warped. Fortunately my gluing efforts allowed it to be relatively flat on one side so putting it through the planer was no problem.


Its really hard see much from these pictures, but these are both sides before planing.

And here I am getting ready to make my first pass. I did nothing extra to attempt to hold the part flat or square.

I am really happy with the results of my planing. The board came out really nice.


Here it is as it came out of the planer and then as I marked it with my template. (It's really hard to see, but there is a penciled outline there!)

Finally, I made new mahogany point blocks and was able to glue most of the rest of my side pieces together. I chose to make new blocks when I found that the shapes that Mr. Siminoff supplies did not match well with what I needed to match the side wood and the mold. While I am comfortable that this is purely a result of inaccuracy on my part when I made my mold, making blocks that match it are now necessary. To do this, I traced the curves of my mold onto paper, offset the lines by the thickness of the side wood and then used those to make new templates.


In this picture (above), I clamped the wild end of the scroll piece back to mold simply for the photo. I intend to make a couple of minor bending adjustments to this piece before gluing it to the tail block.


Sunday, March 15, 2009

More Soundboard

Sunday, March 15, 2009.

Placed another order with Stewart-MacDonald this morning and decided to both update my materials lists on the right side of the screen, here (been kinda lax about keeping that up - sorry), and post a couple more pictures about what I was able to get done yesterday.

One of the things I forgot to include yesterday was that I built myself a thickness measurement stand to check my soundboard (and, later, the base) thickness as I carve.

As you can see, I made this out of a deep C-clamp, an inexpensive dial indicator (both purchased at Harbor Freight) and an old bolt. I removed the clamping screw from the clamp body by simply unscrewing it. As it reached its maximum opening I kept unscrewing, forcing the clamp-end off and allowing the clamp screw to come all the way out leaving me with just the clamp body. Through the hole where the clamp screw had been, I inserted a bolt that now serves as my reference base. Using my angle grinder again, I then cut off about an inch of the other side of the clamp body (enough to allow for the thickness of the dial indicator body) and drilled a hole with which to mount my dial indicator. With the indicator and bolt lined up, all I needed then was to clamp it into my vise. Overall, this measurement stand cost me right at $25. I could have purchased a similar device from one of several suppliers for about $100.

I was able to about 5 to 6 hours yesterday working entirely on shaping the top of the soundboard. Not having much of a feel for just how much material I am removing with each stoke of my carving gouges, I took it pretty slowly. I am pretty happy so far with the results.

With my blood stain still on the scroll, you can see that it is indeed still the same piece of wood. At this rate, I expect I should be done with this stage in next couple of days (dang that pesky day-job stuff).

Saturday, March 14, 2009

Carving the Soundboard

Saturday, March 14, 2009.

This week I started on my soundboard. As you might recall, I purchase my European Spruce Top Wood from Stewart-MacDonald back in January and only now have I really been able to get to work on it. I may well have purchased a bit early, as I speculated back then, but I’m certainly glad to have it now.

It arrived as a mostly precut, book-matched pair of pieces (see my post “Arrival!” in January for pictures) that I finished cutting in half using a handsaw. Next, using my hand planer, I planed the freshly cut section of each of the two halves flat. Then, using my truing board, I dressed the mating edges of each half in preparation for gluing. Below are the results of my truing process.

I was pretty impressed with the final results from the truing process and found that holding the two pieces together up to a light, there were no gaps. Not too bad, I think.

One note - If you choose, as I did, to make the top guide of your truing board from plywood (and I guess this would hold true regardless of what wood you choose), be sure to sand down the very top edge, not so much to effect the squareness of the truing edge, but just enough to get rid of any splinters that might be there. I neglected to do this and ended up with a pretty good sized splinter in the base of my thumb. The price of getting excited, I guess.

So here is the soundboard while the glue is setting. I used my 192 gram strength hide glue for the joint and really like the results.

After letting the glue dry overnight and most of the next day, I used my trusty hand plane again and got the interior surface nice and flat. I would have preferred to use a powered planer for this, but I don’t have one (yet) nor do I know anyone who does. I am really quite pleased with how flat I was able to get it, though, with the hand plane.

Next I traced the finished outline of the top onto the interior surface of the wood using my acrylic template.

MISTAKE #3 (well, really close anyway): As I began to carve, fortunately no more than just the cavity you see in this picture, I realized that I had traced the outline UPSIDE-DOWN. Had I not notice this, I would have ended up making #1 a left-handed mandolin! But because I was so early in the carving process, I was able to erase my outline (done in pencil, thankfully) and re-trace it and continue.

I decided to do all my soundboard carving using hand tools rather than trying some of the power tool methods I have read about (drill press, router, etc.). I did this mostly because I already have a pretty nice selection of woodcarving tools that I am pretty comfortable using and, well, because I don’t have most of the other types (yet). For the soundboard, I am pretty happy with this decision. It is pretty easy to do, goes pretty quickly, and I really like the feel.

As I carved and as Mr. Siminoff recommends in his book, I used my soundboard gauges regularly as I carved to make sure I didn’t go too deeply, too often.

Here are some more pictures of my carving process.


In this picture, you can see I went ahead and trimmed off most of the excess material around the edges. I did this in preparation for starting on the top side.

It may not be really clear from this photo, but I missed on my depths a bit in a couple of places (too deep mostly on the edges). I am hoping this won’t affect the overall product too much, so I am going ahead with it anyway.

Something I found rather interesting was an effect of lighting. All through my initial carving, I worked in my room under pretty normal light. Turning the part back and forth as I carved (I did not have my piece bolted to the bench) and feeling the surface with my hand as I went, I was pretty happy that the surface graduations were pretty smooth. After I got far enough along, I took my soundboard downstairs to shamelessly showoff to my wife a little. At this point it was early evening and the light at her computer where she was sitting was relatively dark so, when I turned the piece to get better lighting on it, the shadow effects from the dimmer light really showed all of the imperfections I had been unable to see before. The thing looked horrible (she ooo’d and aahh’d, anyway - she is so sweet). Now that I knew, I took it back upstairs and commenced to work some more, this time in low lighting. This worked out pretty well.

One of the things I read about in several places was that other (real) luthiers use “scrapers” to smooth the surfaces of their soundboards and backs. At first I wasn’t too sure about this but as I go closer to my desired surface heights I found that my woodcarving tools were just not right for the job and that sandpaper wasn’t doing it, either. Because I didn’t have any scrapers in my toolbox, I decided to make one myself from an old, large wallpaper trowel I hadn’t used for years. After cutting the metal blade off of the trowel handle using an angle grinder with a cut-off blade, I shaped one edge of it to rough shape with my belt sander and the finish-shaped and sharpened it with a hand-file.

Talk about a handy tool, this thing rocks. I used it not only to smooth out the obviously rough areas, but also to “plane” off larger areas that were just a bit too high. I love it. You can see it in the top right corner of the picture below.

This picture shows where I have traced an outline on the top side of the wood and an edge line around the perimeter in preparation of carving on the top. I also show the templates I will use to gauge my progress on it and my scraper.

Here is a closer look at the edge line I drew. By measurement from Siminoff’s drawing, the edge width should end up being just under 3/16” thick. To mark this on my wood, I found that my mechanical pencil, laying on the workbench, makes a mark just at 3/16” - good enough, I figure, to use for roughing the top surface.

Last night I spent about two hours rough carving on the top side. Here are my results, so far.


This picture shows how I am unintentionally “signing” my mandolin as I go. This blood is not from gouging myself with a tool, as you might expect, but from a small splinter that stabbed me in the finger while wiping away some chips from the soundboard. It was such a small stab that I didn’t even know it bled until I saw it on the wood. The wound had already quit bleeding by the time I looked. Oh well. Thankfully this blood spot will be carved off later.

Sunday, March 8, 2009

Installing Truss Rod

Sunday, March 8, 2009.

Not a whole lot done this weekend - we had an extra-large yard sale on Saturday, being the first really nice weekend this year (~75 degrees + sunny), so we are pretty well worn out today. I’d say we had well over 1000 people show up for it.

But I digress - back to mandolin building.

I finished cutting my truss rod slot and the pocket for the nut this evening and then made a filler piece that I glued in.

As you can see, I clamped it while gluing to help prevent rattling later. What you can’t see is that I slid a drinking straw around the rod before gluing it in to make sure that the glue didn’t stick to the rod itself.

I also purchased a block of mahogany off of eBay and was able to cut out my head block.

Before cutting.

And after cutting it out and sanding it smooth with my drill press / drum sander.

Wednesday, March 4, 2009

Some Progress

Wednesday, March 4, 2009.

Been spending more time working on the mandolin, or at least the fixtures and tools for it, and less time writing about it lately (especially since nobody is reading, so far). Here are some pictures of what I got done.

I received my second round of practice wood for bending last week and discovered something interesting - not all practice wood is necessarily the same. This time around, the wood thickness and width are practically identical to that of the real stuff. This means I was able to work with pieces that don’t have to be modified (other than trimming to width) prior to bending. I think my results are pretty good.

I also finally got to finish making all my cello clamps. All I really had left was to glue leather on to one side and then trim them up.


One of the things I finally got done was to get the wood for the back split. As I wrote before, I was not able to do this myself because I don’t have a saw large enough to do it. Initially I started trying by using a handsaw.

This is where I was after about a half-hour of sawing (with a new saw, I might add).

I worked on it for another half-hour the next night and finally gave up. Fortunately I was able to find a friend who has a large bandsaw and got it done. Once cut, I noticed that the wood has a nice cup to it.

Here you can see, that when laid out in book-matching fashion, the two pieces cup in opposite directions. Not having a planer I will try to level this by hand once glued together (wish me luck).

Looking at the top, you can also see that the book-matched edges will need some truing before I can glue them to together. For this, I created myself a “truing board”.


As you can see, I made this out of two pieces of 3/8" plywood with a 2 x 2 on each edge. This assembly is then glued to a piece of 1" thick poplar. Once I had this built, I took a look at my hand plane and realized that the blade on it was in sad need of sharpening. For that, I purchased this honing guide.


Using it along with several grades of wet-dry sandpaper glued to a pane of glass, I should be able to get my plane sharp enough to work with.

And, finally, I have started making the cut-out in the neck for the truss rod. Mr. Siminoff describes using a table saw with a fixture to cut this, but he also mentions that it can be cut using a Dremel or carving chisels. I am a little nervous about using a table saw for this, and lacking the proper bits for my Dremel, I decided to use the carving chisel technique. Here is where I got to last night.


I still have a ways to go before I get the depth right and I still have yet to get the pocket cut in the peg head for the truss rod nut, but I think it is a good start.